| Previous | Contents | Index |
A Proprinter file may contain instructions to select the printer input tray on a Proprinter printer. When you print this file on a different type of printer, the print job will fail if the specified input tray is not available. You can modify the print job to redefine the input tray selection command, using a PostScript setup module. Your system manager can create a setup module to redefine the appropriate Postscript operators, as in the following which shows the contents of a setup module that selects tray 3 for the upper input tray, and tray 1 for the bottom input tray.
/settoptray {statusdict begin 3 setpapertray end} def
/setbottomtray {statusdict begin 1 setpapertray end} def
|
Input tray values are specific to the printer. Refer to the PostScript documentation for your printer to determine the numbers for the available trays.
The input tray selection commands, and the PostScript operators to which the Proprinter translator converts them, are listed in Table 8-3. The default setpapertray value is the value that the translator uses if no other value has been defined. A setup module with a different value would override the default value.
| Bin | Meaning | PostScript Extension Operator | Default setpapertray Value |
|---|---|---|---|
| 0 | No change | ||
| 1 | Upper tray | settoptray | 1 |
| 2 | Lower tray | setbottomtray | 2 |
| 3 | Envelope feeder | setenvelopefeedertray | 3 |
If your Proprinter file requires soft fonts to be loaded in the printer, you can download the font using Proprinter setup modules.
The system manager must create a device control library designated for Proprinter setup modules and include that library in the search list in DCPS$STARTUP.COM, as described in the System Manager's GuideSystem Manager's Guide.
Proprinter setup modules from the Proprinter device control library are handled differently from ANSI and PostScript setup modules. Records from a Proprinter module are not appended with carriage control characters (<CR><LF>) because Proprinter setup modules can include binary data, such as Proprinter fonts and raster graphics. If the Proprinter setup module contains lines of text that must be separated by carriage control characters, you must explicitly specify them in the Proprinter setup module.
Proprinter setup modules are processed without a subsequent page eject command, so that anything printed by such setup modules will appear on the first page of the file.
The List data type is a list numbering tool that prints line-oriented text in a format that is easier to read. The List data type creates output that has:
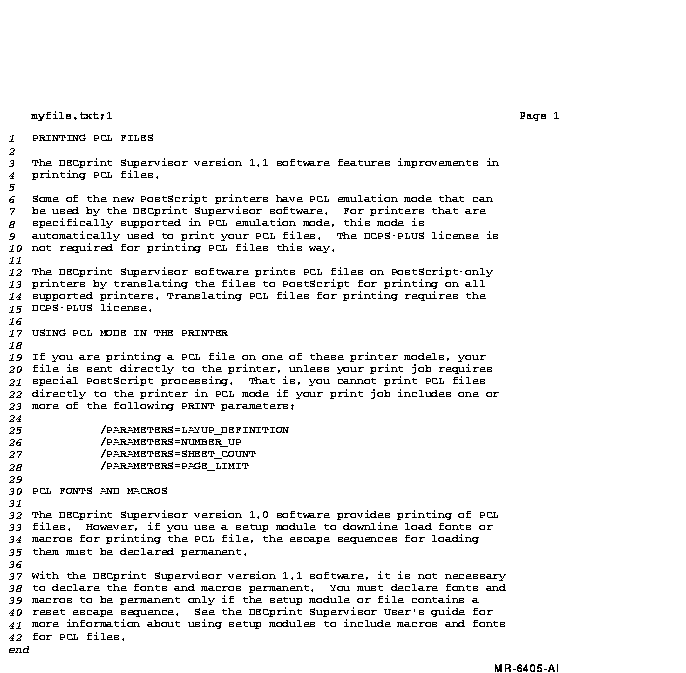
Figure 9-1 is an example of a page printed using the List data type.
Figure 9-1 List Data Type Output
9.1 Using the List Data Type
Use the following PRINT parameter to print your text document using the
List data type:
/PARAMETERS=DATA_TYPE=LIST |
For example, to print the file XREPORT.TXT using the List data type, enter the following command:
$ PRINT XREPORT.TXT/PARAMETERS=DATA_TYPE=LIST |
By default, DCPS prints using the List data type if the file extension is one of the following:
      B32      CPP      MMS
      BAS      CXX      PAS
      BLI      FOR      PLI
      C        H        R32
      CBL      HXX      REQ
      COM      MAR
|
See the DCPS System Manager's Guide for information
about changing this list.
9.2 Using OpenVMS Forms with the List Data Type
The List data type ignores form settings for margins, page width, and so forth when formatting pages. It creates a page with maximum content at a size compatible with both A (Letter) and A4 paper:
Portrait orientation: 80 columns, 70 lines
Landscape orientation: 132 columns, 55 lines
However, any setup modules invoked by the form definition are applied to the print job.
This chapter describes how to print different types of files on a PostScript printer, and shows how to access the printer-specific features. Some features are not supported by all types of printers. You should be aware of the type of file you are printing, and the capabilities of your printer.
There are many types of PostScript printers with unique capabilities and features. Make sure your printer can perform the functions you specify in the print job. If your printer does not have a capability you request (for example, two-sided printing), your print job may be terminated and a message displayed to inform you of the problem. Some of the unique capabilities that may be available on your printer include:
In addition to these printer-specific features, make sure the type of
media you request is loaded in the printer before you enter the PRINT
command.
10.1 Printing Two-Sided Documents
To select two-sided printing, use the SIDES parameter to the PRINT command.
The SIDES parameter provides the printing features listed in Table 10-1.
| Value | Definition |
|---|---|
|
1, ONE, or
ONE_SIDED_SIMPLEX |
Your job prints on one side of the sheet. |
|
2, TWO, or
TWO_SIDED_DUPLEX |
Your job prints on both sides of the sheet. The second side is reached by turning the page about its left edge, as in the binding of a book. |
|
TUMBLE or
TWO_SIDED_TUMBLE |
Your job prints on both sides of the sheet, and alternating pages are rotated 180 degrees. Figure 10-2 shows the format for two-sided tumble printing. The second side is reached by turning the page about its top edge, as in some legal documents. |
| ONE_SIDED_DUPLEX | Your job prints on one side of the sheet but alternate pages may be offset for binding. Retains page layout for duplex printing for copying on duplex copiers. Reflects the placement of margins and page numbers. |
| ONE_SIDED_TUMBLE | Your job prints on one side of the sheet, and alternating pages are rotated 180 degrees. This allows you to make a tumble-formatted copy to take to a copying facility for multiple copies. Reflects the placement of margins and page numbers. |
| TWO_SIDED_SIMPLEX | Your job is printed on both sides of a sheet. This setting does not reflect the placement of margins. |
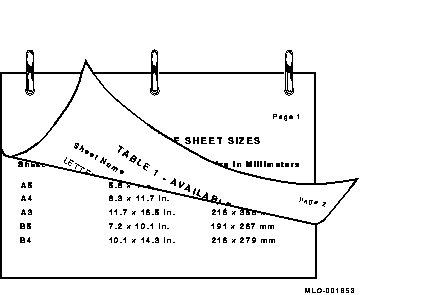
10.2 Specifying Landscape and Tumble Printing
Files printed in landscape orientation (text printed parallel to the
long edge of the paper) are, by default, printed in tumble mode when
printed on two sides of the paper (see Figure 10-1). This provides
output that can be bound along the top and flipped for reading.
Figure 10-1 Landscape Orientation with Two-Sided Printing
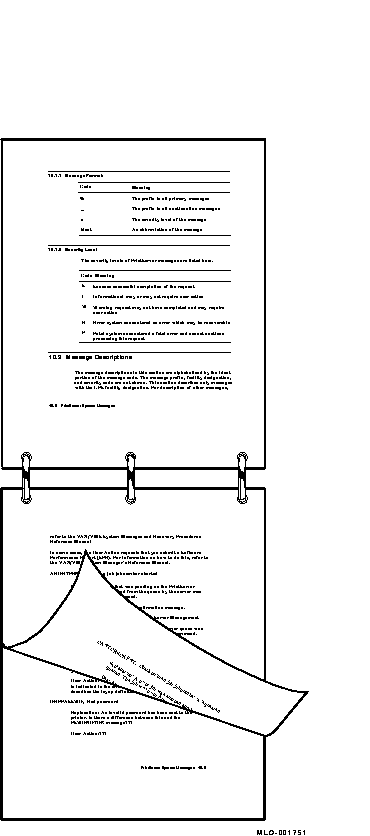
To print pages in portrait orientation and tumble mode (as shown in Figure 10-2), use the SIDES=TUMBLE parameter. For example:
$ PRINT /PARAMETERS=SIDES=TUMBLE MYFILE.PS |
Figure 10-2 Portrait Orientation with Two-Sided Tumble Printing
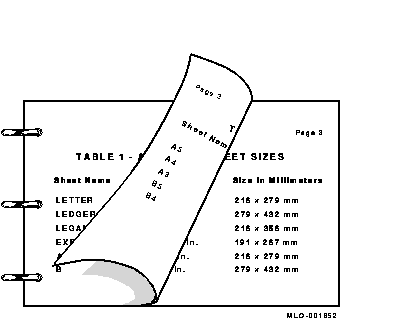
If you need a landscape oriented document printed on two sides and bound along the short edge (see Figure 10-3), use both the SIDES=TUMBLE and the PAGE_ORIENTATION=LANDSCAPE parameters in the PRINT command.
For example:
$ PRINT /PARAMETERS=(SIDES=TUMBLE,PAGE_ORIENTATION=LANDSCAPE) MYFILE.PS |
Figure 10-3 Landscape Orientation with Two-Sided Tumble Printing
If you specify SIDES=TUMBLE for a print job destined for a printer that does not support tumble printing, your print job is terminated and the following message is displayed:
DCPS-E-TUMBNOSUP, printer-name does not support tumble printing |
To display the SIDES parameter values that are supported by your printer, enter the HELP PRINT_PARAMETER SIDES command and select the subtopic that describes your printer.
10.3 Specifying Multiple PostScript Files in Duplex Print Jobs
The DECprint Supervisor software treats adjacent PostScript files in a print
job as if they were combined into a single file. Therefore, when you
print multiple PostScript files in one duplex print job, pages from one
file may be printed on the same sheet with pages from another file. All
other types of files automatically start on a new sheet.
Use the following command to print two PostScript files using both sides of the sheet:
$ PRINT /QUEUE=PS$A14 /PARAMETERS=SIDES=2 FILE1.PS,FILE2.PS |
If FILE1.PS has three pages, page 1 is printed on the front of the first sheet; page 2 is printed on the back of the first sheet; and page 3 is printed on the front of the next sheet. Then, page 1 of FILE2.PS is printed on the back of that sheet, and so on.
To begin printing each new file on a new sheet, use the /FLAG, /BURST, or /TRAILER qualifier to print a file separation page between files. For example, the following command prints FILE1.PS and FILE2.PS and includes a flag page between each file:
$ PRINT /QUEUE=PS$DUPLEX /PARAMETERS=SIDES=2 /FLAG FILE1.PS,FILE2.PS |
You can specify the size of the physical sheet or type of media on which to print your file. The DECprint Supervisor software may assume this information automatically from the:
You can explicitly request a certain sheet size by including the SHEET_SIZE parameter in your PRINT command to specify a value that describes the physical media size. For example:
$ PRINT /PARAMETERS=SHEET_SIZE=A4 MYFILE.PS |
To list the values available with your printer, enter the HELP PRINT_PARAMETER SHEET_SIZE command and select the subtopic that describes your printer.
Some sheet sizes are known by multiple names, as listed in Table 10-2. You may use any of these names to specify a sheet size to DCPS. The DCPS term is the term that DCPS prints on the trailer page and reports in error messages.
| DCPS Term | Synonym |
|---|---|
| Business_Envelope | Com10 |
| 7_Envelope | Monarch |
| Halfletter | Statement |
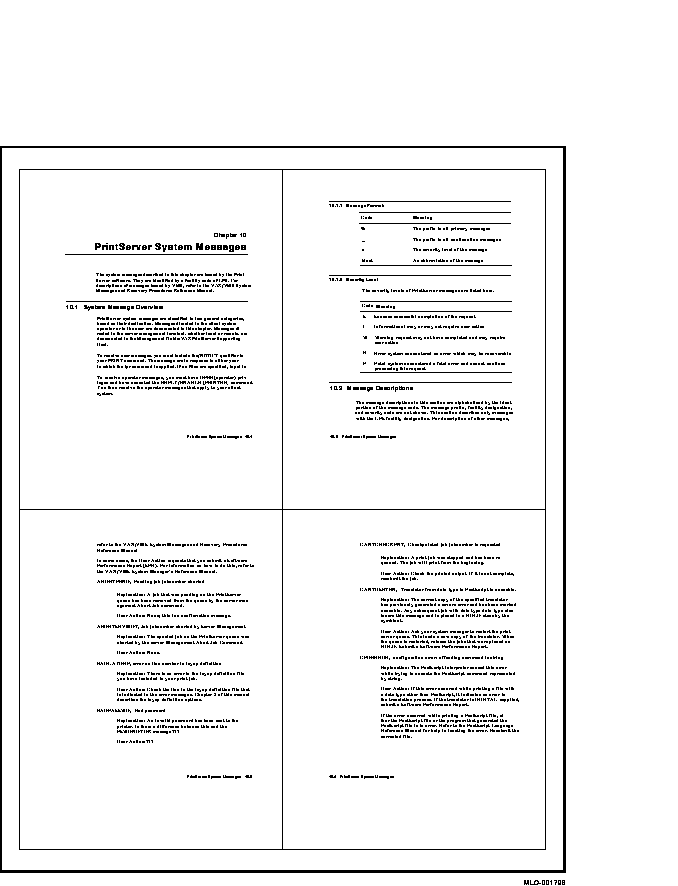
You can print more than one page on each side of a sheet of paper. Printing this way saves paper and provides customized printed documents. Figure 10-4 shows four pages on each side of a sheet. Use the NUMBER_UP parameter in the PRINT command to specify the number of pages to print on each side of a sheet of paper. For example:
$ PRINT /PARAMETERS=NUMBER_UP=4 MYFILE.PS |
To fit multiple pages on a side, the DECprint Supervisor software changes the
size of the logical pages in the document to fit in the area on the
physical side. This change does not affect the relationship of the page
height to the page width.
10.5.1 Using NUMBER_UP with Input Tray Selection Operators
If you specify NUMBER_UP=1 for a file that has input tray selection operators, the printer changes paper trays, but the image is not resized to fit the new paper.
Input tray selection commands in a file are ignored if the file is printed with a NUMBER_UP value greater than 1. If you include the /NOTIFY qualifier in the PRINT command, a message is displayed to inform you of this action.
Figure 10-4 Printing Four Pages to a Sheet (NUMBER_UP =4)
When you print using NUMBER_UP, the aspect ratio (that is, the relationship of the height of the page to the width of the page) is preserved. Therefore, a portrait-shaped page retains its portrait shape. However, because NUMBER_UP may scale and rotate the pages to make the best use of the available space, the logical page and physical sheet may have different orientations.
Figure 10-5 Portrait Orientation with NUMBER_UP =2
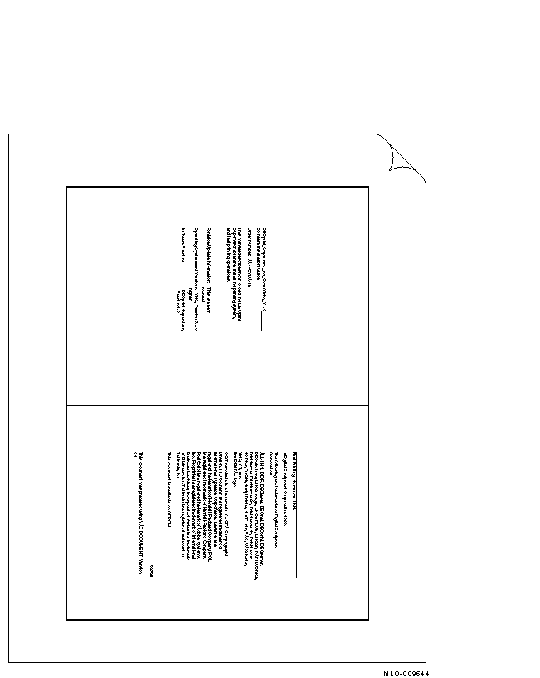
The pages print vertically, but you hold the sheet in landscape orientation to read them. To print two pages per sheet using portrait orientation as shown in Figure 10-5, use the following command:
$ PRINT /PARAMETERS=(NUMBER_UP=2,PAGE_ORIENTATION=PORTRAIT) file-spec |
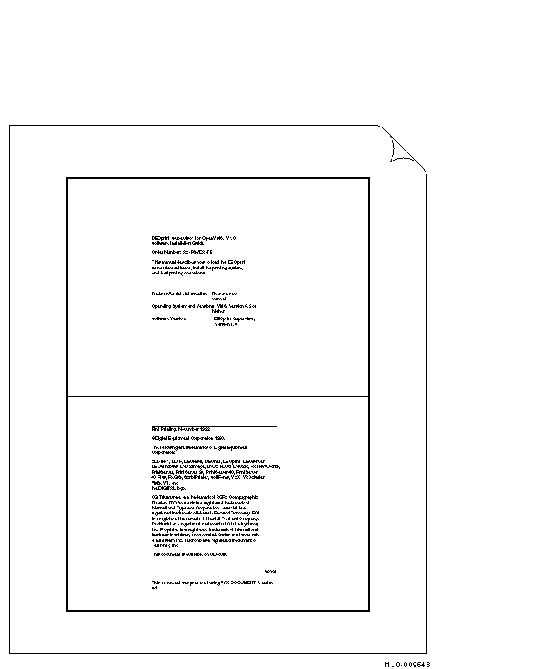
To print two pages per sheet using landscape orientation as shown in Figure 10-6, use the following command:
$ PRINT /PARAMETERS=(NUMBER_UP=2,PAGE_ORIENTATON=LANDSCAPE) file-spec |
Figure 10-6 Landscape Orientation with NUMBER_UP =2
10.5.3 Using NUMBER_UP with Multiple Files
When you specify more than one file in a print job and use NUMBER_UP to
print more than one page on each side of a sheet, all the files in the
print job are printed using the NUMBER_UP value. If any files are not
PostScript files, they are printed starting on a new sheet. If any
files are PostScript files, they are printed starting at the next page
spot (the next location defined for a page).
For example, to print two ANSI files, one with seven pages and one with one page printed at four pages per sheet, enter the following command:
$ PRINT /QUEUE=PS40$A14 /PARAMETERS=NUMBER_UP=4 7PAGES.TXT,1PAGE.TXT |
The first four pages of 7PAGES.TXT are printed on the first sheet. The last three pages of 7PAGES.TXT are printed on the second sheet; one page spot is left blank. The file 1PAGE.TXT is printed on the third sheet, with three page spots left blank.
To print two PostScript files, one with seven pages and one with one page, printed four pages per sheet, enter the following command:
$ PRINT /QUEUE=PS$IGUANA /PARAMETERS=NUMBER_UP=4 7PAGES.PS,1PAGE.PS |
The first four pages of 7PAGES.PS print on the first sheet. The last three pages of 7PAGES.PS and the first page of 1PAGE.PS print on the second sheet.
To ensure that each new file in the multiple PostScript file job is started on a new sheet, specify file separation pages using the /BURST, /FLAG, or /TRAILER qualifier. For example:
$ PRINT /QUEUE=PS40$A14 /PARAMETERS=NUMBER_UP=4 /FLAG FILE1.PS,FILE2.PS |
You can print a specific page or range of pages in a print job.
To print a specific range of pages from the print job, include the PAGE_LIMIT parameter in the PRINT command and the range of pages. For example, to print only the 50th through the 100th page of a print job, enter the following command:
$ PRINT /PARAMETERS="PAGE_LIMIT=(50,100)" MYFILE.PS |
Quotation marks are required when the parameter value contains a comma, as in this PAGE_LIMIT parameter. |
The pages you specify do not correspond to the page numbers in the document. They represent the number of pages that have been printed. You can specify printing of just the last portion of this file by using the following command:
$ PRINT /PARAMETERS="PAGE_LIMIT=(50,)" MYFILE.PS |
This example instructs the DECprint Supervisor software to start printing at the 50th page in the print job, and continue to the end of the print job.
You can specify printing of just the first part of a document by using the following command:
$ PRINT /PARAMETERS=PAGE_LIMIT=50 MYFILE.PS |
This example instructs the DECprint Supervisor software to print the first 50 pages of the print job.
When you use the PAGE_LIMIT parameter, your print job completes when
the upper-limit value is reached. Therefore, if you
specify the PAGE_LIMIT parameter and do not print to the end of the
file, you do not get a file trailer page for the file that was cut off.
The rest of the data for that file and for any subsequent files for
that print job is ignored.
10.6.1 Using PAGE_LIMIT with Multiple Copies
Do not use the PAGE_LIMIT parameter when you make multiple copies with
the /COPIES or /JOB_COUNT qualifiers. The print job may be completed
before the next copy begins printing. If you want to print multiple
copies of a job for which you specify PAGE_LIMIT, use the SHEET_COUNT
parameter (see Section 1.5).
10.6.2 Restarting Interrupted Print Jobs
You can save paper when you restart interrupted print jobs by using the PAGE_LIMIT parameter to start the print job near the point where the print job stopped. For example:
$ SET ENTRY /PARAMETERS="PAGE_LIMIT=(30,)" /RELEASE 301 |
In this example, print job 301 was released and printing started on the 30th page of the print job.
Using the PAGE_LIMIT parameter will not save system overhead or processing time because the DECprint Supervisor software must process the entire print job from the beginning in order to print selected pages. |
When you use the PAGE_LIMIT parameter with duplex (two-sided) print jobs, the software ignores the respective positions of left (verso) and right (recto) pages. The first page you specify with the PAGE_LIMIT parameter will always be a recto page.
To successfully print with PAGE_LIMIT on both sides of the paper and maintain the positions of recto and verso pages, you must specify a recto page for the first page to print. |
The maximum PAGE_LIMIT value, for either the starting or ending page, is 999999.
| Previous | Next | Contents | Index |