11.8 Using Other Hyperapplication Features
| Previous | Contents | Index |
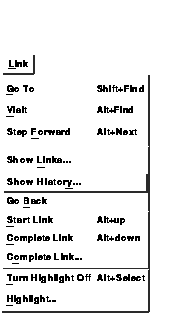
You can see the characteristics of a link and delete a link by using the Show Links... menu item. This menu item displays the Links dialog box, which is illustrated in Section 11.5.
If you click on the Show Link... button, a dialog box appears with detailed information about the selected link. This dialog box contains the same information as shown in the Complete Link... dialog box, illustrated earlier in Section 11.4, except that the Retain This Source button does not appear. You can edit the Relationship and Description entry boxes.
To delete a link, click on the Delete button in the Links dialog box.
As soon as you delete a link, the object becomes an orphan; to make it
no longer an orphan, delete the link by selecting the object to which
it is linked and then using the Delete button in the Show Links...
dialog box in the appropriate hyperapplication.
11.8 Using Other Hyperapplication Features

Whenever you perform a Visit or Go To operation, the LinkWorks history is updated to reflect your operations. To see the history of your navigation operations, choose the Show History... menu item, which displays the following dialog box:
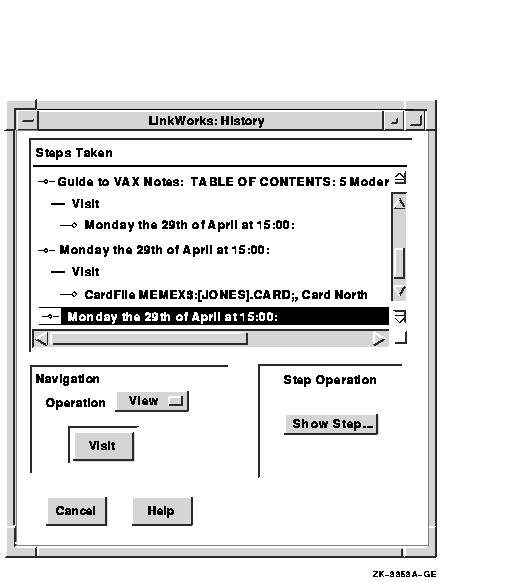
You can use this dialog box to visit objects that are listed and to modify history information.
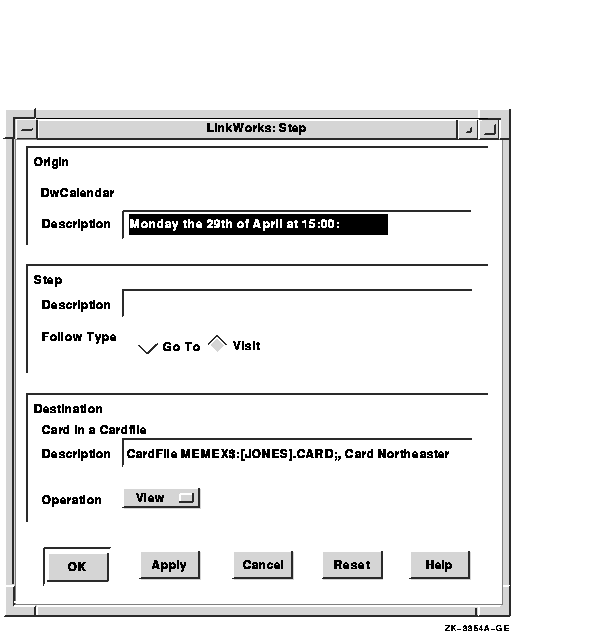
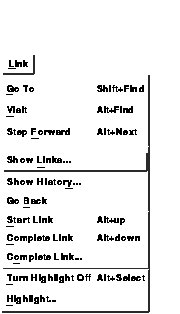
The Go Back menu item, described earlier in Section 11.5, removes the last step from the history and performs a Go To operation to the previous step. Thus, Go Back lets you step backward through the history list while deleting steps.
The Step Forward menu item moves to the next step in the currently
active path and performs the step. Thus, Step Forward lets you step
forward through the current active path.
11.9 Advanced LinkWorks Concepts
Information about links that you make and follow is stored in a hyperinformation linkbase. By default, you have a linkbase named LWK_PERSONAL in your login default (VMS) or home (ULTRIX) directory. However, you can cause LinkWorks to use another linkbase as your default personal linkbase by defining the VMS logical name LWK_PERSONAL or the ULTRIX environment variable LWK_PERSONAL to point to that linkbase file. Although you probably will not need to create additional linkbases, you can create them by using the LinkWorks Manager application.
Each linkbase contains a number of hyperinformation objects. These objects let you organize your links as they become more numerous and complex. The same principle is included in many software applications. For example, in Mail you begin with one folder (MAIL) in one drawer (your primary mail file). As you receive more and more messages, you organize them into folders. If the number of folders grows sufficiently, you might decide to create new drawers, each with several folders.
The hyperinformation linkbase can contain the following objects:
For information about creating and using linkbases, linknets, linknet lists, paths, and path lists, see the chapter on LinkWorks Manager in the DECwindows Motif for OpenVMS Applications Guide.
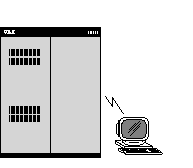
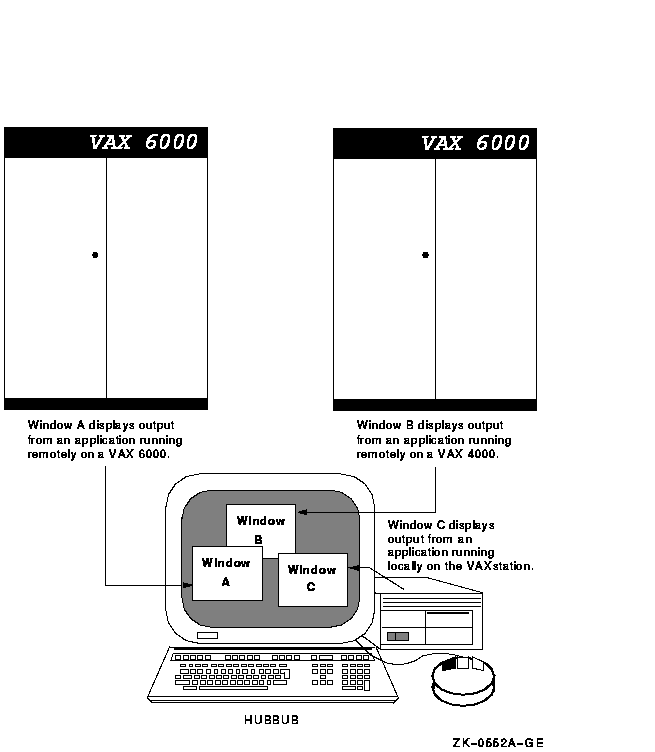
DECwindows expands your computing opportunities by letting you run applications across a network. Distributing applications in this way means that they can run on another computer and be displayed on your workstation, so you can take advantage of larger computers that may be better suited to a specific computing task. Although the application runs on another system, it looks the same as any other application running on your workstation. You can even run applications on an ULTRIX system for display on your VMS workstation.
By default, however, your workstation monitor can display only those applications that are running on your workstation. This prevents users on other systems in the network from displaying applications on your workstation monitor or from capturing and displaying your keystrokes (including your password) on another monitor.
You can run an application on a remote system for display on your workstation by completing three easy steps:
These steps are described in more detail in the sections that follow.
12.1 Enabling Network Access to Your Workstation Monitor
Initially, you are authorized to run applications only from your workstation, where your current session is running. This means that you cannot log in to another system and run applications for display on your workstation monitor unless you authorize yourself to do so.
From Session Manager, you can give users access to your workstation display by specifying their nodes and user names. By default, you give access to users on systems that are connected by DECnet--VAX software. DECnet--VAX is one transport by which nodes in a network communicate. (The transport passes information between the application and the display.) You can also give access to users on systems running other transports, such as TCP/IP software.
The user name, node name, and transport information you provide act as
filters to screen out all except a selected class of users. For
example, you can give access to your workstation to user WINKEN on node
BLINKN, which is a node on a system that is running DECnet software. By
giving access only to WINKEN on node BLINKN, you deny access to another
user WINKEN on node NOD.
12.1.1 Authorizing Workstation Access in a DECnet Network
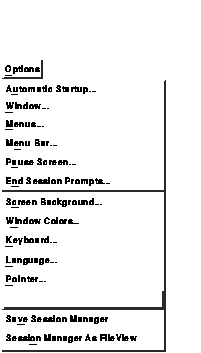
To authorize yourself or others to display applications on your VMS workstation in a DECnet network:
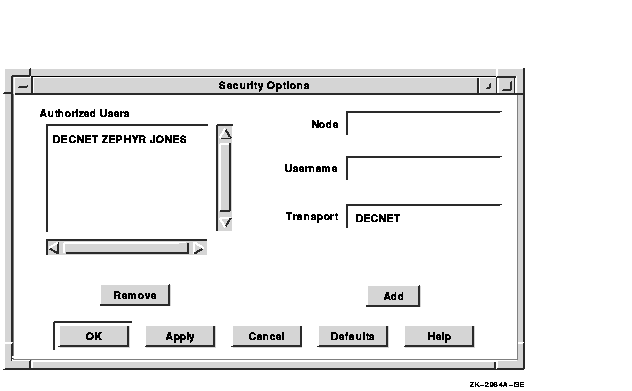
If you are running an application on an ULTRIX system, you should authorize the user a second time, but this time type the user identification number (UID) of the user you want to authorize. This is necessary because some applications identify the user with the user name and some with the UID. (The UID is a small number---less than 3200.) |
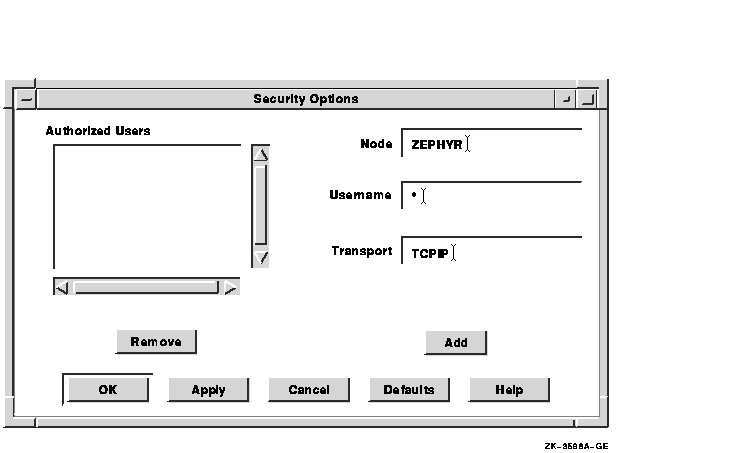
The following example shows how to add your name to the list of authorized users of your display, thereby ensuring that you can display DECwindows applications on your workstation from system ZEPHYR.
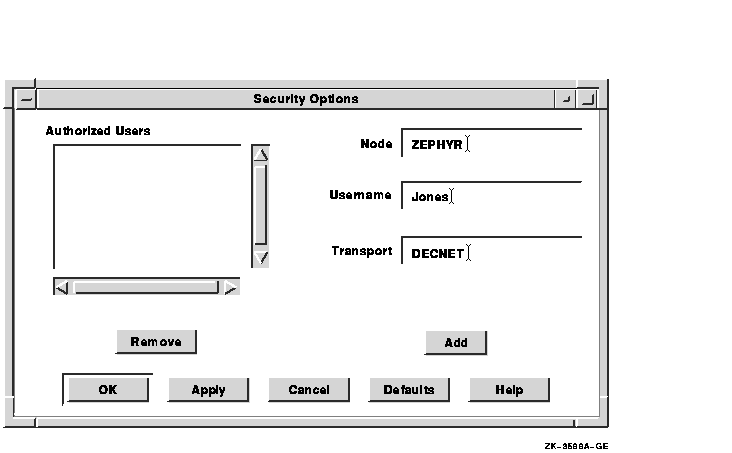
Be aware that each node, both the source and destination, must be defined in each other's network node database. For example, to display applications on node HUBBUB from ZEPHYR, HUBBUB must be entered in ZEPHYR's network node database, and ZEPHYR must be defined in HUBBUB's network node database.
You can use an asterisk (*) wildcard in the Username or Node entry box
to authorize entire classes of users. For example, to authorize all
users who are logged in to node HUBBUB to display on your workstation,
type an asterisk (*) in the Username entry box and HUBBUB in the Node
entry box. Then click on Add. Session Manager adds that text to the
list of authorized users. It's a good idea to give access to only those
users who you know require it. Giving access to an indeterminate number
of users is not recommended because this practice can compromise the
security of your system.
12.1.2 Authorizing Workstation Access in an Internet Network
If your system is part of an Internet (TCP/IP) network, you can run applications across that network. An Internet network can connect
To run applications on a remote system for local display, you'll need both a transport interface (like the TCP/IP transport interface included in DECwindows) and transport software (like the VMS/ULTRIX Connection ([UCX]) software product) to connect the applications with the workstation display. If you have another vendor's transport software, make sure you have a compatible transport interface. If you're not sure whether you have both software components, see your system manager.
Different vendors' implementations of TCP/IP transports use different call interfaces. Because of this, the TCP/IP transport interface included in DECwindows is compatible only with the VMS/ULTRIX Connection software. |
To authorize yourself or others to display applications on your VMS workstation in an Internet network:
As in a DECnet environment, each node, both the source and destination, must be defined in each other's network node database. For example, to display applications on node HUBBUB from ZEPHYR, HUBBUB must be entered in ZEPHYR's network node database, and ZEPHYR must be defined in HUBBUB's network node database.
The following example shows how to make sure that users on system ZEPHYR can display DECwindows applications on your workstation.
12.1.3 Disabling Workstation Access
To remove an entry from the list of currently authorized users:
Once you are authorized to display applications on your workstation from another system, you can log in to other systems and direct the display to your workstation by using the DCL command SET DISPLAY. Although DECwindows must be available on these systems, they need not be workstations.
The SET DISPLAY/CREATE command affects only those applications running in the window from which you issue the command. This means that, although you might be running one application on your workstation and displaying it on another workstation, you can continue to run applications on your workstation for display in other windows on your monitor.
From DECterm or a FileView DCL Command window, log in to the remote system using the DCL command SET HOST, and enter the following command:
$ SET DISPLAY/CREATE/NODE=display_node |
In this command, display_node is the workstation on which you want to display the application. You specify the /CREATE qualifier the first time you want to run an application and direct the display. If you subsequently direct the display to another system, omit this qualifier. For information about additional SET DISPLAY command qualifiers you can use with the /CREATE qualifier, see the OpenVMS DCL Dictionary.
Enter the DCL command SHOW DISPLAY to make sure the display now points to your workstation. For example, if you logged in to remote system ZEPHYR from your system HUBBUB and directed your display back to HUBBUB, you see this information:
Device: WSA2: Node: HUBBUB Transport: DECNET Server: 0 Screen: 0 |
Device is your workstation device and might vary each time you use SET DISPLAY and SHOW DISPLAY. Node is the network system to which the display is now pointing. Transport refers to the transport (DECNET, LOCAL, or TCP/IP) that passes information between the application and the display. Server and Screen are usually 0. (For information about using the /SERVER and /SCREEN qualifiers, see the OpenVMS DCL Dictionary.)
You can now run your application on ZEPHYR for display on HUBBUB if you are authorized to do so. See Section 12.3 for more information.
When you finish running the application, you can either disable the
remote display or direct the display to a third system, as described in
the next two sections.
12.2.2 Disabling a Remote Display
Specifying the /DELETE qualifier with the SET DISPLAY command disables further connections to the remote display. For example, to disable the remote display from ZEPHYR to HUBBUB, enter the following command:
$ SET DISPLAY/DELETE |
Any applications you run on ZEPHYR are no longer displayed on HUBBUB.
12.2.3 Directing a Remote Display to a Third System
You can direct the display to a third system by entering the SET DISPLAY command and the name of the node to which you want to direct the display. For example, to direct a remote display to a third system named ROMA, enter the following command:
$ SET DISPLAY/CREATE/NODE=ROMA |
Enter the command SHOW DISPLAY to see that the display now points to ROMA.
To direct the display to an ULTRIX workstation if the node name contains lowercase characters, you must surround the display node name with quotation marks. For example, to display on ULTRIX node pluto, enter the following command:
$ SET DISPLAY/CREATE/TRANSPORT=TCPIP/NODE="pluto" |
Quotation marks are optional for a node name that contains all
uppercase characters.
12.2.4 Directing a Remote Display to Your Own System
If you access your own system using the SET HOST command, you need to direct your display before you can run applications on your system. If your system is HUBBUB, you can define your display using either of the following commands:
$ SET DISPLAY/CREATE/TRANSPORT=LOCAL/NODE=0 |
$ SET DISPLAY/CREATE/TRANSPORT=LOCAL/NODE=HUBBUB |
Using the /TRANSPORT=LOCAL qualifier increases the performance of applications running and displaying on your system. Zero (0) is the standard shorthand notation for representing your system.
By default your own node is authorized to display on your system using
either the LOCAL or DECNET transports, but not TCPIP. To authorize your
own node using TCPIP, you must enter a zero (0) for the node name.
12.3 Running Applications from a DCL Command Line
Once you have directed your display to your workstation, you can run FileView and the desktop applications described in the DECwindows Motif for OpenVMS Applications Guide from another system by typing the following command lines at the DCL prompt ($):
| To run this application | Enter this command |
|---|---|
| Bookreader | RUN SYS$SYSTEM:DECW$BOOKREADER |
| Calculator | RUN SYS$SYSTEM:DECW$CALC |
| Calendar | RUN SYS$SYSTEM:DECW$CALENDAR |
| Cardfiler | RUN SYS$SYSTEM:DECW$CARDFILER |
| Clock | RUN SYS$SYSTEM:DECW$CLOCK |
| CDA Viewer | VIEW/INTERFACE=DECWINDOWS filename |
| DECterm | CREATE/TERMINAL=DECTERM |
| EVE | EDIT/TPU/DISPLAY=DECWINDOWS |
| FileView | RUN SYS$SYSTEM:VUE$MASTER |
| RUN SYS$SYSTEM:DECW$MAIL | |
| Message Panel | SYS$SYSTEM:DECW$MESSAGEPANEL |
| Notepad | RUN SYS$SYSTEM:DECW$NOTEPAD |
| Print Screen | RUN SYS$SYSTEM:DECW$PRINTSCREEN |
| Paint | RUN SYS$SYSTEM:DECW$PAINT |
| Puzzle | RUN SYS$SYSTEM:DECW$PUZZLE |
For more information about adding qualifiers to the command lines that begin with the RUN command, see the DCL command descriptions in the OpenVMS User's Manual. For more information about adding qualifiers to the commands that start CDA Viewer, DECterm, and EVE, see the OpenVMS DCL Dictionary.
You can also use these command lines to run the desktop applications from DECterm or from FileView's DCL Command window on your workstation. To run multiple applications simultaneously from a single DECterm or FileView DCL Command window, add SPAWN/NOWAIT/INPUT=NL: to the beginning of each command line.
| Previous | Next | Contents | Index |