To Create a Run-Time Help Volume
- HelpTag Output
-
To Run the dthelptag Command Manually
To Review and Correct Parser Errors


.sdl file extension identifies a run-time help file.

The Help System defines desktop actions and data types for help-specific files. This lets you easily process and view a run-time help file from the desktop.
dthelptag command manually in a terminal window.Helptag does two significant tasks:
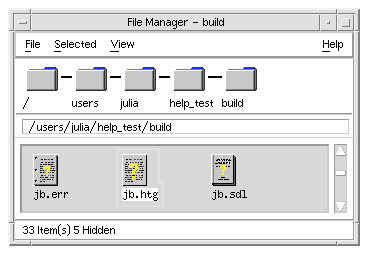
sdl file icon in File Manager, or use the dthelpview command in a terminal window.

If you have written help for an application and the application is ready to use, you can display your help by running the application and asking for help.
ctg file and any additional source files that are included using entities. Also, graphics file names are validated. Be sure the /usr/dt/bin/dthelptag command is in your search path. (If you're not sure how to do this, ask your system administrator.)

The volume.htg file is processed and creates a volume.sdl file and volume.err file.
sdl. If any errors occurred during processing, they are reported in an error file (volume.err). If no errors were encountered, the volume.err file contains copyright information and several status lines.
Setting the onerror=go option in your helptag.opt file allows the parser to continue processing (if possible) after encountering an error. Without the onerror=go option, the parser halts when the first error is detected. The volume.sdl file is not created until the source file is without errors.
The volume.sdl file, plus your graphics files, are read by the Help System to display help topics. The run-time help file has the same base name as your volume.htg file. For example, if your volume.htg is named Librarian.htg, then the help volume name is Librarian.sdl.

Caution: Never rename a run-time help file or graphics file after running HelpTag. The information stored in the volume.sdl file depends on the original names. If you rename your volume.htg file or any of your graphic files, be sure to rerun HelpTag.
- dthelptag command-options volume parser-options
dthelptag MyVolume
Using the -verbose option causes the progress of the processing to be displayed on your screen:
dthelptag -verbose MyVolume
Adding a search path enables HelpTag to find files stored in a subdirectory (of the current directory) named graphics:
dthelptag -verbose MyVolume search=graphics
memo
onerror=go
search=graphics/
search=entityFiles/
Before producing the final version of the help volume, you would remove the memo and onerror=go lines.
Each error listed in the volume.err file begins with a string of asterisks (*****). For example, the following error was detected at line 54 of the file actions:
*****
Line 54 of actions,
Missing end tag for LIST:
...the execution host becomes the current working directory.

<s2 id=EverythingYouNeedToKnow> E...
Current element is LIST begun on Line 28 of actions.
A few lines of the file are shown to give you some context for the error. Also, there is a hint that the current element is a LIST started on line 28 of the same file. An <s2> is not allowed within a list, so it appears that the author forgot to enter the <\list> end tag. It's possible for a single, simple error to produce several error messages. This is because the first error may cause the parser to lose track of the intended context, making it impossible to interpret subsequent markup properly.
Errors can also be introduced by using an incorrect entity name. In most instances, it is simply a misspelled word. In other cases, an entity name may have been changed, but cross-references to the original name were overlooked. When you change an entity name, remember to search your source file (or files) for all instances of the entity name.
Similarly, changing the ID assigned to an element affects any cross-reference or link to that topic.
If you are writing application help and your application is ready to use, you can also view your help by running your application, then requesting help just as a user would.
The default action displays the file using the Help Viewer.
- dthelpview -helpVolume volume.sdl
- dthelpview -helpVolume /full-path/volume.sdl
dthelptag MyVolume
If no errors occurred, you could then display it with this command:
dthelpview -h MyVolume.sdl
First, create the personal help directory in your home directory where you can register the volume:
mkdir -p $HOME/.dt/help/C
Now create a symbolic link to the Myvolume.sdl file (which is created by the HelpTag software):
ln -s /projects/help/Myvolume.sdl $HOME/.dt/help/C/Myvolume.sdl
You can now display the volume with the following command (regardless of your current directory) because the.dt/help/C directory within your home directory is one of the first places the Help System looks for help volumes.
dthelpview -helpVolume Myvolume
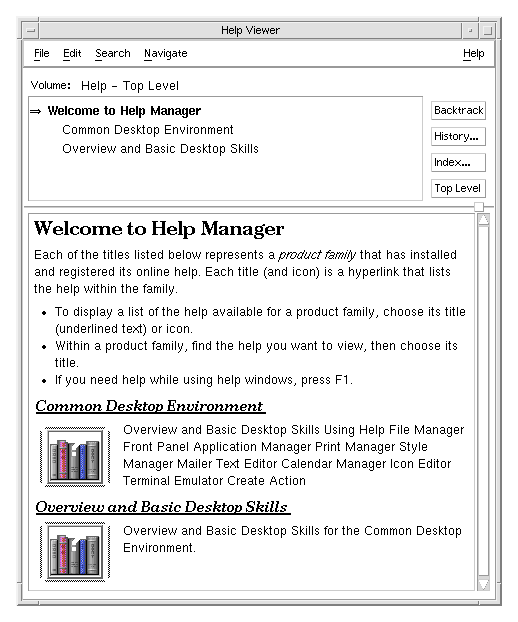
You can view assorted help volumes directly from the browser volume. This allows access to application-specific help without starting the application. Or, if you are writing standalone help, this is the only way for users to get to your help.
Figure 4-1 Browser help volume displaying help families

To make your help volume available in the browser volume, you create a help family file. When your application is registered on the desktop, the presence of a family file causes the help volume to be included in the browser volume.
browser.hv in the user's HomeDirectory/.dt/help/$DTUSERSESSION directory. After initial creation, the volume is updated only if changes have occurred.To manually update the browser volume, refer to "Generating a Browser Help Volume (dthelpgen)."
Any help volume listed in the browser volume can be viewed by selecting the volume title. Because you can display and navigate through different volumes, the browser help window includes an additional button, called Top Level. You can use this button to return to the browser list after displaying one or more volumes.
Refer to the CDE Advanced User's and System Administrator's Guide for a detailed explanation of how an application and its help files are installed on the desktop.
family.hf
*.charSet:      character-set
*.title:        family title
*.bitmap:       icon file
*.abstract:     family abstract
*.volumes:      volume volume volume ...
Where character-set specifies the character set used by the family title and family abstract strings. See "Understanding Font Schemes" for a list of supported character sets. The family title and family abstract should not contain any HelpTag markup; this file is not processed with the HelpTag software.The icon file is optional. If you provide one, the path you use to specify the location of the file should be a complete path name. If you do not provide an icon, do not include the *.bitmap resource in your family file.
The list of volume names identifies which volumes belong to the family. The volumes will be listed in the order they appear on this line. A volume may be listed in more than one family.
If any of the values occupy more than one line, end each line -- except the last -- with a backslash (\).
Any line in the file that begins with an ! (exclamation mark) is a comment line and is ignored.
The CDE Advanced User's and System Administrator's Guide describes how to run the dtappintegrate script.
The help family file actually included with the desktop software may not exactly match this example.!############################################## !# # !# Desktop Help Family # !# # !# Version 1.0 # !# # !############################################## *.charSet: ISO-8859-1 *.title: Desktop Version 1.0 *.bitmap: /usr/dt/appconfig/help/C/cdelogo.pm *.abstract: Overview and Basic Desktop Skills \ * File Manager and the Desktop \ * Front Panel \ * Application Manager \ * Style Manager \ * Text Editor \ * Mailer *.volumes: Intromgr.sdl Filemgr.sdl FPanel.sdl Appmanager.sdl Stylemgr.sdl Textedit.sdl Mailer.sdl

- dthelpview -helpVolume browser
dthelpgen (1) man page
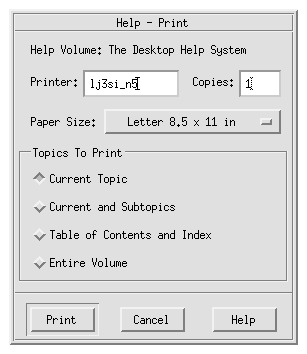
Figure 4-2 Help print dialog box

dthelpview does not ensure that the links will operate correctly from within your application.
dthelpview for each ID:
dthelpview -helpVolume volume.sdl -locationId id
Where id is the location ID that you want to test. If dthelpview displays the correct topic, then the ID is okay.
onerror=go option in the helptag.opt file. If you have done this, you should remove the option and process your source files a final time to ensure that no errors are encountered. 


