![[Compaq]](../../images/compaq.gif)
![[Go to the documentation home page]](../../images/buttons/bn_site_home.gif)
![[How to order documentation]](../../images/buttons/bn_order_docs.gif)
![[Help on this site]](../../images/buttons/bn_site_help.gif)
![[How to contact us]](../../images/buttons/bn_comments.gif)
![[OpenVMS documentation]](../../images/ovmsdoc_sec_head.gif)
| Document revision date: 10 November 2000 | |
![[Compaq]](../../images/compaq.gif) |
![[Go to the documentation home page]](../../images/buttons/bn_site_home.gif)
![[How to order documentation]](../../images/buttons/bn_order_docs.gif)
![[Help on this site]](../../images/buttons/bn_site_help.gif)
![[How to contact us]](../../images/buttons/bn_comments.gif)
|
![[OpenVMS documentation]](../../images/ovmsdoc_sec_head.gif)
|
|
| Previous | Contents | Index |
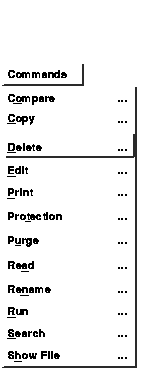
By using the Delete command to delete the files you no longer need, you make room on your disk for other files.
You can also delete a subdirectory if it does not contain files. See Section 6.6.2 for more information.
To delete one or more files:
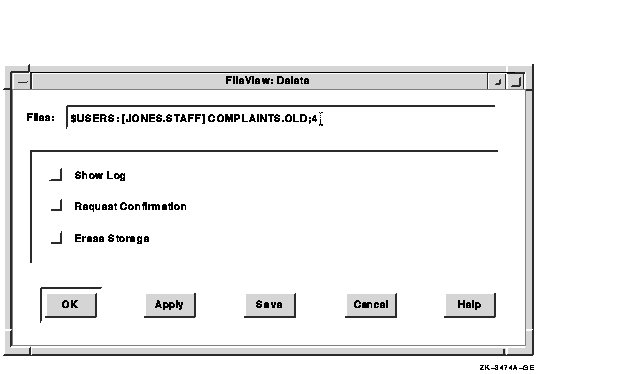
| Enable this option | To |
|---|---|
| Show Log | Display the file specification of each file as it is deleted. |
| Request Confirmation | Display a prompt asking whether to delete the file. |
| Erase Storage | Erase the selected files from your disk so that the deleted data no longer physically exists. |
If your file list does not include version numbers and you select a file for deletion, FileView deletes all versions of the file.
To use wildcards in the file specifications of the files you want deleted, choose the Delete command without first selecting any files. In the following example, choosing the Delete command and entering the file specifications as shown deletes all versions of the files FORECAST1.DDIF, FORECAST2.DDIF, and FORECAST3.DDIF. The second and third file specifications use the file type of the first input file. Note, however, that some form of version number (here specified as wildcards) must be included in each file specification.
Files: FORECAST1.DDIF;*,FORECAST2;*,FORECAST3;* |
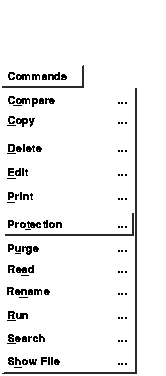
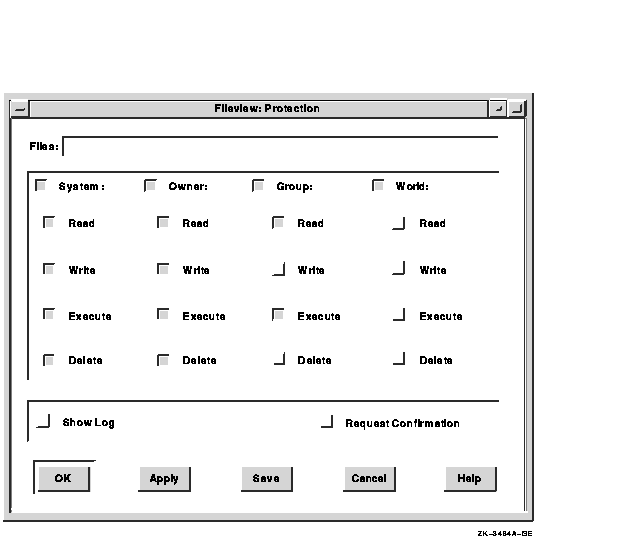
To protect one or more files from being accessed by other users:
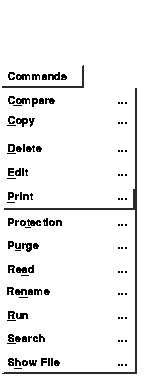
To send one or more files to a printer:
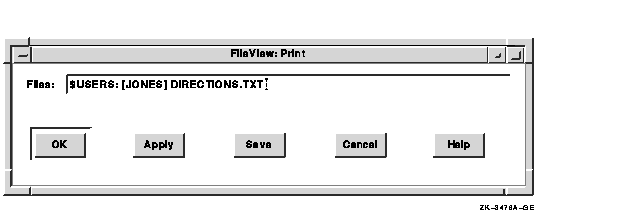
To use wildcards in the file specifications of the files you want to print, choose the Print command without first selecting any files. In the following example, choosing the Print command and entering the file specifications as shown submits the files DIRECTIONS.TXT and CURRENCY.TXT and the highest versions of all files with file type COM as a single print job:
Files: DIRECTIONS.TXT,CURRENCY,*.COM |
For more information about printing files, see Chapter 4.
6.3.13 Running Programs
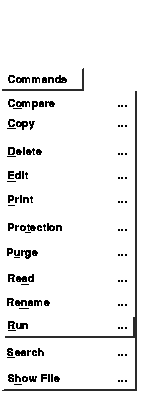
You can use the Run command to run a program or to invoke a DCL command file. A program usually has an EXE file type. A DCL command file has a COM file type.
To run a program:
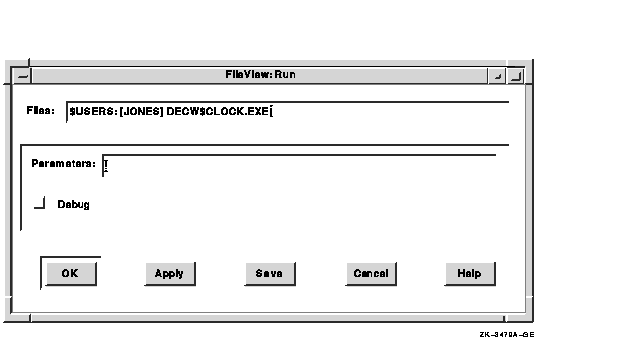
| Enable this option | To |
|---|---|
| Parameters | Add any parameter to the Run command. Type the parameter in the text entry box provided. If the file you want to run is a DCL command file, these parameters are passed to it. |
| Debug | Run the program under the control of VAX Debugger. To run an image without the debugger that has been linked with DEBUG, be sure this button is disabled. |
If the Work in Progress dialog box is displayed, it reports that the file is being run.
In the following example, choosing the Run command and entering the file specification as shown executes the program MORTGAGE.EXE:
Files: [.SCHEDULES]MORTGAGE.EXE |

You can open a new FileView window that maintains the file and directory context of the current FileView window. When you choose New View... from FileView's File menu, FileView copies the display from the current FileView window into the new window and updates it, leaving the current FileView window in its original state. Any changes you make to the current FileView window (such as deleting a file or changing the information in the File Filter entry box) without applying them are reflected in the new FileView window.
You can also open a new FileView window that reflects changes you make to the File Filter or Directory entry boxes in the current FileView display. To open a new FileView window:
A new FileView window is opened that reflects the new file and
directory information you specified. The File Filter and Directory
entry boxes in the current FileView window are reset to the original
text.
6.5 Accessing Files and Applications Quickly
FileView gives you two shortcuts to access files and applications
quickly: pop-up menus and double-click commands.
6.5.1 Using Pop-Up Menus to Execute Commands
You probably execute the same few commands on a specific type of file. For example, you might edit, type, or copy a TXT file, but you would never run it. To help you perform file tasks more quickly, each file type has a corresponding pop-up menu that contains the commands you are most likely to use on that kind of file.
To see the contents of a pop-up menu for a specific file type, press and hold MB3 on a file name in your file list. Choose the command you want to execute on that file. The next time you display this pop-up menu, the command you last chose will be positioned under the pointer.
If you don't like the pop-up menu that is defined for a specific file
type, you can change it. See Chapter 9 for information about
customizing pop-up menus.
6.5.2 Using Double-Click Commands
FileView executes a predefined command when you double click on some types of files. By using double-click commands, you can start file tasks quickly. For example, double clicking on a CARD file opens Cardfiler. Double clicking on an EXE file runs that program.
To see the double-click command defined for a specific file type:
If you don't like the double-click command that is defined for a
specific file type, you can change it. See Chapter 9 for information
about changing a double-click command definition.
6.6 Working with Directories
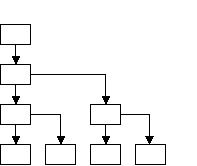
To access files on your system, you need to work with and navigate the directory structure. You might also need to work with devices other than your default device.
You can access your own and other directory structures that have been set up to allow public access. With the correct process privileges, you can access files and directories on other devices or nodes. Your privilege classification controls what commands and functions you are authorized to execute from your account. For more information about setting process privileges, see Chapter 5.
With FileView you can perform the following device and directory operations:
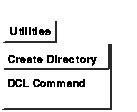
You can do all your work---including using files and running applications---in your top-level directory and never move from it. However, by creating and using subdirectories, you can organize your files into groups.
If you have the SYSPRV privilege, you can also create a top-level directory. See Section 5.5 for more information.
To create a directory:
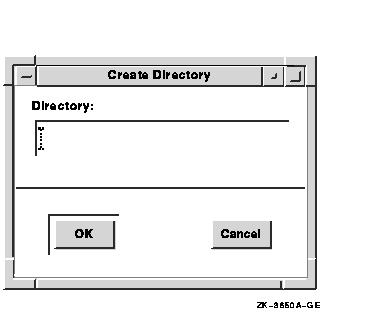
Before you attempt to delete a subdirectory file, you must confirm that it contains no files. Select the subdirectory from the subdirectory list. If the subdirectory contains files, delete them. To delete the empty subdirectory file:
If you have subdirectories, FileView displays a subdirectory list that lets you move up and down your directory structure to access your subdirectories and the files they contain. By setting default to another directory, you change your current directory.
FileView appends the subdirectory name to the directory name in the Directory entry box and displays the contents of that subdirectory in the current file list.
If you have subdirectories in your new default directory, they are now
displayed in the subdirectory list. The subdirectories that were
previously displayed are displayed in a sibling directory list to the
left of the subdirectory list.
6.6.4 Using Wildcards in the File Filter
From any point in a directory structure, you can search a subdirectory in that structure or another directory by using the ellipsis (...) or hyphen (-) wildcard character.
You do not have to change directories to search the contents of another
directory. By entering a full file specification (including a directory
and device name, if appropriate) in the File Filter entry box, you can
search the contents of that directory without changing directories. Any
output produced by a FileView command continues to be directed to your
current directory.

6.6.4.1 Using the Ellipsis (...) Wildcard
Use the ellipsis wildcard to search down the directory structure. You can list the contents of directories or search for one file in a directory. Using the ellipsis wildcard allows you to conduct a broad search of an entire directory structure.
The following example shows how to use the ellipsis to list the contents of the subdirectories under [JONES]. Notice that the current directory is not changed.
File Filter: [JONES...] Directory: $USERS:[JONES.STAFF] |
The following example lists the latest versions of all files named DIRECTIONS.TXT in [JONES] and all subdirectories under [JONES]:
File Filter: [JONES...]DIRECTIONS.TXT Directory: $USERS:[JONES.STAFF] |
If you begin the directory specification with an ellipsis, the search begins from the current directory. This example searches all subdirectories under [JONES] named PROJECT and lists the latest versions of all files named SALARIES.LIS:
File Filter: [...PROJECT]SALARIES.LIS Directory: $USERS:[JONES] |
In the following example, the current directory is [JONES]. This example searches [JONES] and all subdirectories under [JONES] and lists the latest versions of all files named HOLIDAYS.LIS:
File Filter: [...]HOLIDAYS.LIS Directory: $USERS:[JONES] |
However, if you begin the directory specification with a period, only the subdirectory that is one level lower in the directory structure than the current directory is searched. In the following example, the current directory is [JONES]. This example searches only the [JONES.LETTERS] subdirectory for the file OFFER.TXT, and not [JONES.STAFF.LETTERS]:
File Filter: [.LETTERS]OFFER.TXT Directory: $USERS:[JONES] |
To search all top-level directories and their subdirectories from wherever you are in the directory structure, use the asterisk (*) wildcard followed by an ellipsis. The following example (which might require READALL or BYPASS privilege) searches all the directories and subdirectories on the device except for the master file directory (MFD). Note that this search might take a long time if you search the directory structure on a large device.
File Filter: [*...] Directory: $USERS:[JONES] |

When you learned how to navigate a directory structure, you saw how to use the hyphen wildcard to move up the directory structure one level at a time. By using the hyphen wildcard in a file specification in the File Filter entry box, you can list the contents of a directory or search for a file within a directory structure. Each hyphen refers to the directory one level up from the current one. You can follow the hyphens with directory and subdirectory names to move up and down the directory structure on another path.
Unlike the ellipsis wildcard, the hyphen wildcard limits your search to one level of the directory structure at a time.
The following example lists the contents of $USERS:[JONES] while the current directory remains [JONES.STAFF]:
File Filter: [-] Directory: $USERS:[JONES.STAFF] |
In the following example, the current directory is[JONES.SCHEDULES]. This example lists the latest version of FUNDING.TXT in [JONES.STAFF]:
File Filter: [-.STAFF]FUNDING.TXT Directory: $USERS:[JONES.SCHEDULES] |
You can specify more than one hyphen. The following example displays the contents of the directory [JONES], which is two levels up in the directory hierarchy, while the current directory remains [JONES.SCHEDULES.CURRENT]:
File Filter: [--] Directory: $USERS:[JONES.SCHEDULES.CURRENT] |
If you enter so many hyphens that you point above the master file
directory (MFD), FileView displays an error message.
6.7 Executing a DCL Command
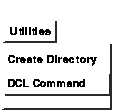
You can execute a DCL command directly from FileView by choosing DCL Command from the Utilities menu. FileView opens a DCL Command window and displays the DCL prompt ($). Any DCL command you enter is executed in the context of the current directory.
To close the DCL Command window temporarily, shrink the window to an icon by clicking MB1 on the window's minimize button. By continuing to choose DCL Command from FileView's Utilities menu, you create additional Task Output windows that you can close and reopen.
| Previous | Next | Contents | Index |
![[Go to the documentation home page]](../../images/buttons/bn_site_home.gif)
![[How to order documentation]](../../images/buttons/bn_order_docs.gif)
![[Help on this site]](../../images/buttons/bn_site_help.gif)
![[How to contact us]](../../images/buttons/bn_comments.gif)
|
| privacy and legal statement | ||
| 5633PRO_005.HTML | ||