![[Compaq]](../../images/compaq.gif)
![[Go to the documentation home page]](../../images/buttons/bn_site_home.gif)
![[How to order documentation]](../../images/buttons/bn_order_docs.gif)
![[Help on this site]](../../images/buttons/bn_site_help.gif)
![[How to contact us]](../../images/buttons/bn_comments.gif)
![[OpenVMS documentation]](../../images/ovmsdoc_sec_head.gif)
| Document revision date: 10 November 2000 | |
|
|
|
|
|
|
| Previous | Contents | Index |
Part 2 contains the information you need to customize your DECwindows working environment. It includes the following chapters:
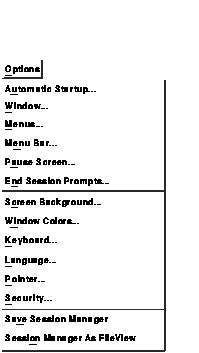
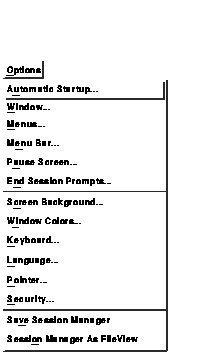
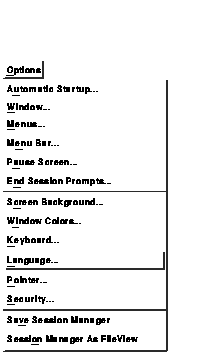
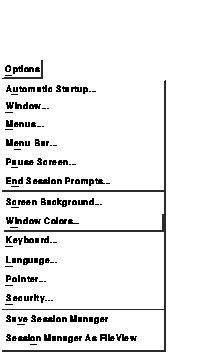
Session Manager's Options menu includes menu items for customizing session features such as your keyboard, language, window colors, and security settings.
This chapter describes how to customize your session. Where appropriate, this chapter also describes how to customize the screen display for three types of workstations:
7.1 Applying Your Settings
Choosing each menu item from the Options menu displays a dialog box.
Every Options dialog box contains push buttons you can use to record
your settings, cancel the dialog box, or display help.
| Click on | To |
|---|---|
| OK | Save new settings and dismiss the dialog box. |
| Apply | Save new settings without dismissing the dialog box. |
| Defaults | Reinstate the system default settings defined when you installed the DECwindows software. (Note that the Defaults button does not save your changes. You must click on the OK or Apply button to save the default settings.) |
| Cancel | Dismiss the dialog box without changing any settings. If you made any changes without applying them, clicking on the Cancel button cancels those changes. |
| Help | Display help about the specific option dialog box. |
If you begin every workday by logging in and starting the same few applications---perhaps DECterm, Calendar, and Mail, you can save yourself the effort of re-creating that environment by customizing Session Manager to start them for you.
To customize your startup environment:
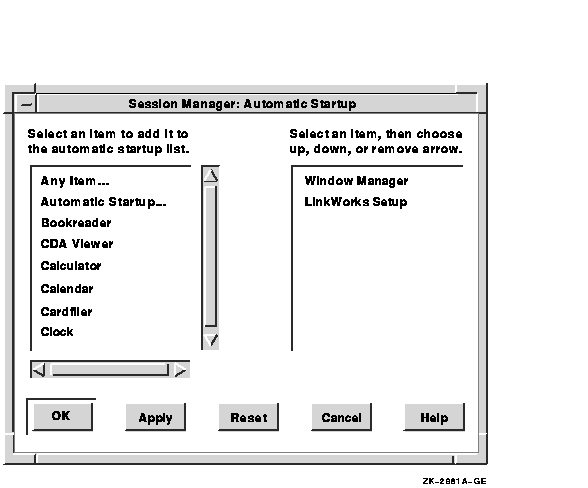
The Window Manager is a main component of your DECwindows working environment. Do not remove the Window Manager from your automatic startup list unless you are replacing it with another window manager. |
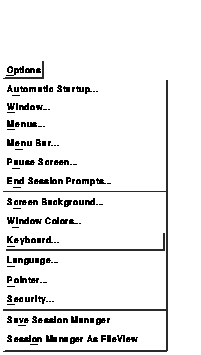
To change your keyboard settings, choose Keyboard... from Session Manager's Options menu. Session Manager displays the Keyboard Options dialog box.
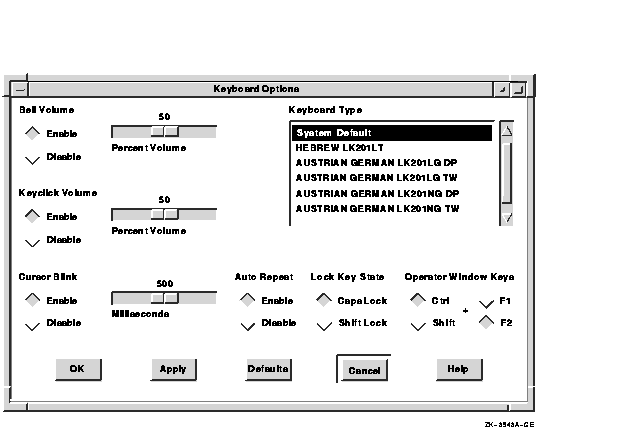
From the Customize Keyboard dialog box, you can change any of the following settings:
Bell Volume
A warning bell sounds to alert you to system messages. Adjust the bell's volume by dragging the arrow in the Percent Volume slider right or left, or move the pointer to a location on the slider and click MB1. Click on the Disable button to disable the bell.Keyclick Volume
Each time you press a key, the keyboard makes a clicking sound. This setting is indicated by a shaded button. Adjust the clicking volume by dragging the arrow in the Percent Volume slider right or left, or move the pointer to a location on the slider and click MB1. To disable the keyclick sound, click on the Disable button.Cursor Blink
DECwindows displays a blinking insertion cursor in every text entry box. This setting is indicated by a shaded radio button. Adjust the cursor blink rate by dragging the arrow in the Milliseconds slider right or left, or move the pointer to a location on the slider and click MB1. To disable the blinking cursor, click on the disable button.Auto Repeat
When a key is pressed longer than normal, it repeats until it is released. This setting is indicated by a shaded button. To disable Auto Repeat, click on the Disable button.Lock Key State
Normally, you can produce capital letters but not shifted number keys when you press the Lock key on your keyboard. You can, however, make your keyboard work just like a typewriter keyboard by clicking on the Shift Lock button. Choosing the Shift Lock option produces both capital letters and shifted number keys when you press the Lock key.Operator Window Keys
Normally, you press Ctrl+F2 to open the operator window. You might, however, want to assign other definitions to those keys. To change how you open the operator window, click on any combination of the Ctrl or Shift and F2 or F1 buttons.Keyboard Type
The location of specific characters on the keyboard varies depending on the keyboard model. Selecting the keyboard type that matches your keyboard model allows the system to display the correct character when you press the corresponding key.The system default keyboard type is North American. When you installed DECwindows, you might have chosen another keyboard type, such as French, to correspond to your keyboard model. This keyboard type became the new system default. This means that every DECwindows session started on that workstation uses the French keyboard type.
If the keyboard on your workstation does not match the keyboard type specified when DECwindows was installed, you must set the keyboard type to match the keyboard model. This changes the keyboard type temporarily without permanently changing the system default keyboard type. (For example, you might plug an Austrian German keyboard into a workstation whose system default keyboard type, specified when DECwindows was installed, is French.)
To find your keyboard model number, turn the keyboard upside down and look for a label that specifies the model number. The model number should be in a format similar to LK201-xx. (The model number might also be listed as simply LK201. In this case, the xx you need is in another place on the label. Look for a number similar to nn-nnnnn-xx.) Use this number to select a keyboard type from the Keyboard Type list box. For example, if you are using an Austrian German keyboard and your keyboard model is LK201-NG, select the Austrian German LK201-NG keyboard type.
For information about matching your keyboard model to a DECwindows keyboard type or changing the system default keyboard type, see the complete list of keyboard types in theVMS Version 5.4 Upgrade and Installation Manual.
For any language other than North American or U.S., you can also specify whether you want your keyboard to act as a data processing (DP) or typewriter (TW) keyboard. Selecting a data processing keyboard type enables the characters on the right half of the keycaps. Selecting a typewriter keyboard enables the characters on the left half of the keycaps.
To use this new keyboard type for subsequent sessions, you must save the new setting before you end the current session. The new keyboard type is in effect for your sessions only after DECwindows verifies your password at the start of each new session.
Unless you specify otherwise, DECwindows applications are displayed in American English but are available in multiple languages. If you have the correct language support installed on your system, you can use DECwindows in another language.
To set another session language, choose Language... from Session Manager's Options menu. Session Manager displays the Language Options dialog box.
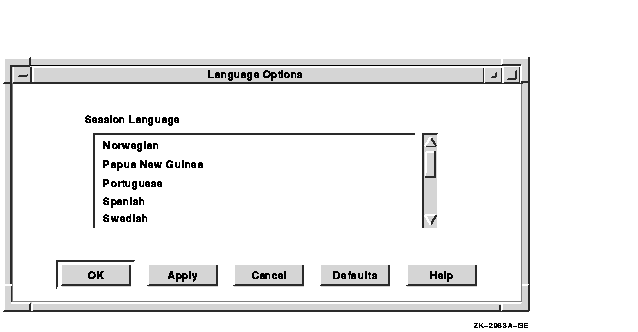
Scroll through the list of languages and select the one you want. The next application you start is displayed in that language. If your system does not support the selected language, the application is displayed in American English.
Language capabilities might vary between systems. For example, your system might have the language support required to display applications in French. If you select French as your session language, any applications you run on your workstation are displayed in French. However, if you run an application on a remote node that does not support French, and you direct the display to your workstation with the SET DISPLAY command, the application is displayed in American English.
To find out whether an application is available in another language, see the documentation for that application.
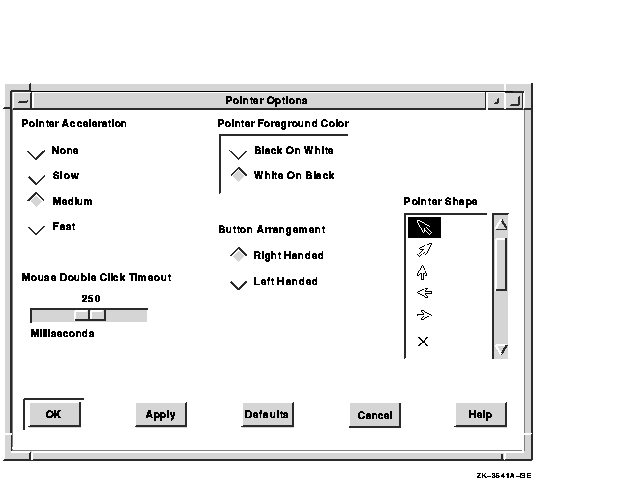
7.5 Changing Your Pointer Settings
You can change the shape and color of the pointer, as well as certain mouse characteristics. To change your mouse and pointer settings, choose Pointer... from Session Manager's Options menu. Session Manager displays the Pointer Options dialog box, which looks like this on a monochrome system:
The Customize Pointer dialog box looks like this on intensity and color systems:
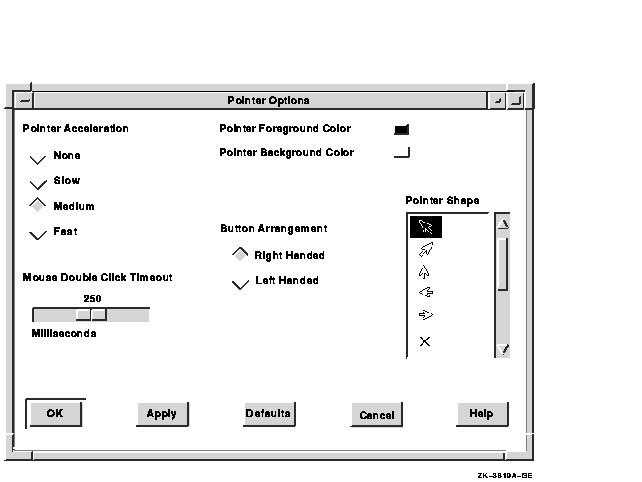
From the Pointer Options dialog box, you can change any of the following settings:
Pointer Acceleration
Click on one of the four options to vary the rate at which the pointer moves in relation to the mouse. The None setting keeps the pointer speed constant. The Fast setting makes the pointer move farther as you move the mouse faster. Thus, you can move the pointer to another part of the screen without moving the mouse the same relative distance. The preset option is Medium.Mouse Double-Click Timeout
DECwindows can distinguish between two successive single clicks and a double click. To change the speed by which DECwindows expects one click to follow another in a double-click sequence, drag the arrow in the Mouse Double Click Timeout scale right to increase the speed. Drag the arrow to the left to decrease the speed. You can also move the pointer to a location on the scale and click MB1.Pointer Foreground Color
The pointer consists of an outline and a filled center.On a monochrome system, the pointer's filled area is white with a black outline by default. Click on the Black On White button to reverse the fill and outline colors.
On intensity and color systems, the pointer's filled area or foreground is black by default. To change this setting, click on the Pointer Foreground Color button. Session Manager displays a color mixing dialog box. For more information about mixing colors, see Chapter 4.
To see your changes, click on Apply or OK in the Pointer dialog box.
Pointer Background Color
This setting applies to color and intensity systems only. To change the default pointer background color, click on the Pointer Background Color button. Session Manager displays a color mixing dialog box. For more information about mixing colors, see Chapter 4.To see your changes, click on Apply or OK in the Pointer dialog box.
Button Arrangement
The preset mouse button arrangement---MB1 on the left and MB3 on the right---is natural for a right-handed user. You can switch the mouse button arrangement by clicking on the Left Handed radio button. The right mouse button becomes MB1 and the left mouse button becomes MB3. MB2 stays the same.Pointer Shape
By default, the pointer is a left arrow. To change the pointer shape, scroll through the list of shapes and select the one you want.
7.6 Changing Your Session Manager Window Settings
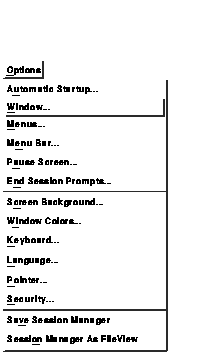
You can change Session Manager's icon name and window name as well as its startup state. To change your Session Manager window, choose Window... from Session Manager's Options menu. Session Manager displays a Window dialog box.
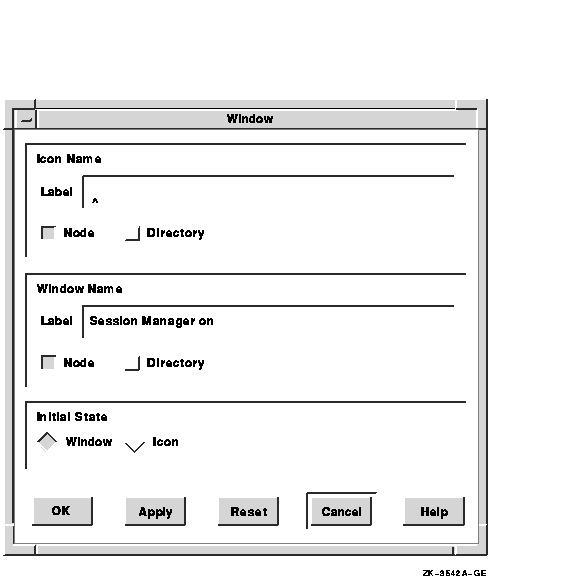
From the Window dialog box, you can change the following settings:
Icon Name
To change Session Manager's icon label, type the new label name in the Icon Name entry box.Window Name
To change Session Manager's window label, type the new window name in the Window Name entry box.Initial State
Session Manager is displayed as a window at the start of each session. Click on the Icon button in the Initial State entry box to specify that Session Manager be stored as an icon at the start of every session.
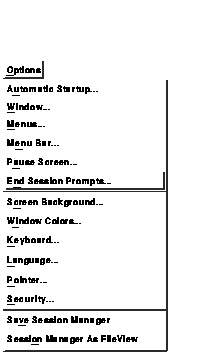
When you end your session, Session Manager executes several procedures. To alter this sequence, choose End Session Prompts... from Session Manager's Options menu. Session Manager displays the End Session Prompts Options dialog box.
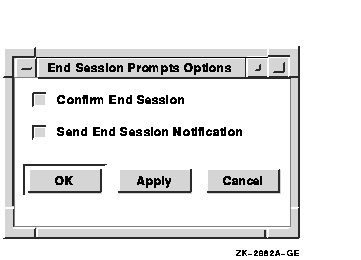
From the End Session Prompt Options dialog box, you can change the following settings:
Confirm End Session
When you end a session, Session Manager asks you for confirmation. This setting is indicated by the shaded radio button. To disable the confirmation message, click on the Confirm Quit Session button. You do not receive a confirmation message when you end your session.Send End Session Notification
When you end a session, Session Manager notifies every current DECwindows application. Some applications respond to this message and save important data. This setting is indicated by the shaded radio button. To prevent Session Manager from sending an end session message, click on the Send End Session Notification radio button.
7.8 Writing Your Own Pause Screen Messages
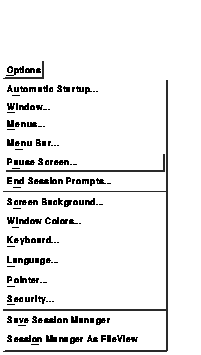
When you put your session on hold and lock your workstation, the Session Manager clears your screen and displays the Pause Session dialog box. You are prompted as follows: "Type your password to resume the session." To change this message, choose Pause Screen... from Session Manager's Options menu. Session Manager displays the Pause Screen Options dialog box.
Type your new Pause Screen text in the text entry box in this dialog box. Click on OK or Apply.
To see your new message, choose Pause from Session Manager's Session Menu.
7.9 Changing Your Screen Background Settings
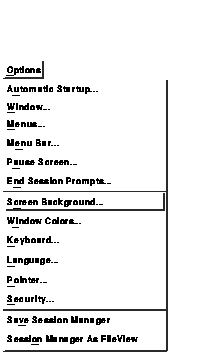
To change your screen background, choose Screen Background... from Session Manager's Options menu. Session Manager displays the Screen Background Options dialog box.
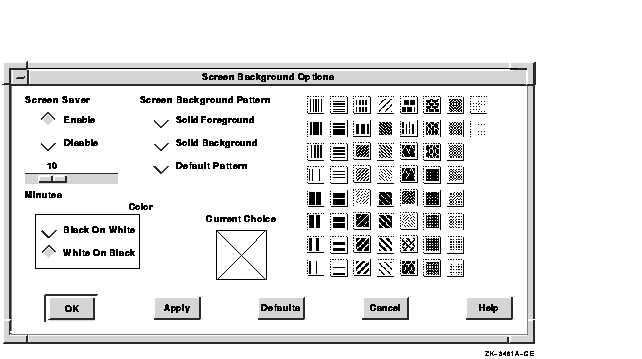
From the Screen Background Options dialog box, you can change any of the following settings:
Screen Saver
Screen Saver extends the life of your monitor by shutting off its display after a specified time. By default, the monitor shuts off its display after 10 minutes of keyboard or mouse inactivity. To vary the amount of time that Screen Saver waits before shutting down the display, drag the arrow in the slider right or left, or move the pointer to a specific location on the slider and click MB1. Click on the Disable button to keep the display on indefinitely. Click on Apply or OK to see your change.Screen Background Pattern
To change the default background pattern, click on a pattern in dialog box. The selected pattern is displayed in the pattern viewer. Click on OK or Apply to see your selection in effect.To create a solid background or foreground, click on the Solid Foreground or Solid Background button. To display the default pattern, click on the Default Pattern button.
Solid Foreground
The screen pattern, when set to anything other than the default pattern, consists of a screen foreground (the filled area in the pattern) and a screen background (the pattern's outline). The selected pattern is displayed in the pattern viewer.To change the default screen color on a monochrome system, click on the White On Black radio button to reverse the fill and outline colors.
To change the default screen color on intensity and color systems, click on the Solid Foreground button. The Session Manager displays a color mixing dialog box. For more information about mixing colors, see Chapter 4.
To see your new setting, click on Apply or OK.
Solid Background
This setting applies to intensity and color systems only. To change the default screen background color, click on the Solid Background button. Session Manager displays a color mixing dialog box. For more information about mixing colors, see Chapter 4.
7.10 Changing Your Window Color Settings
Whether you have a monochrome, intensity, or color system, you can change the look of your DECwindows display. For example, you can alter the background and foreground patterns and the window and screen colors. If you have a color system, you can choose from a wide palette of colors to design a visually pleasing display.
To change your Window color settings, choose Window Colors... from Session Manager's Options menu. Session Manager displays the Window Color Options dialog box.
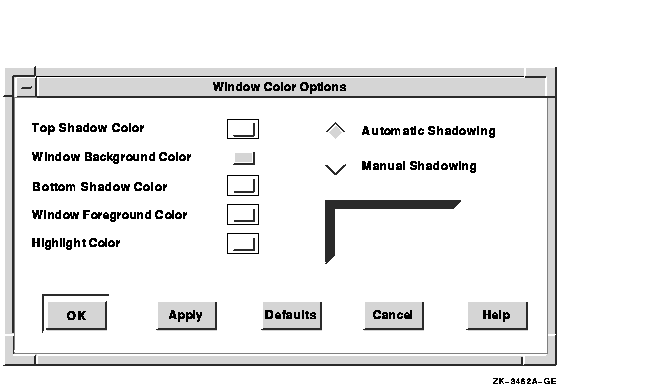
Window color changes do not take effect immediately. |
From the Window Color Options dialog box, you can change any of the following settings:
Top Shadow Color
Window top and bottom shadow colors have to be well matched to present the three-dimensional look of DECwindows Motif. DECwindows helps you to do this by automatically determining top and bottom shadow colors when you change the window color.To choose your own top shadow colors:
- Click on the Manual Shadowing radio button to disable Automatic Shadowing.
- Click on the Top Shadow Color button.
Session Manager displays a color mixing dialog box. For more information about mixing colors, see Chapter 4.Window Background Color
To change the default window background color, click on the Window Background Color button. Session Manager displays a color mixing dialog box. For more information about mixing colors, see Chapter 4.If you save your changes by clicking on Apply or OK in the Window Colors Options dialog box, your new setting takes effect when you start your next session.
Bottom Shadow Color
Window top and bottom shadow colors have to be well matched to present the three-dimensional look of DECwindows Motif. DECwindows helps you to do this by automatically determining top and bottom shadow colors when you change the window color.To choose your own bottom shadow colors:
- Click on the Manual Shadowing radio button to disable Automatic Shadowing.
- Click on the Bottom Shadow Color button.
Session Manager displays a color mixing dialog box. For more information about mixing colors, see Chapter 4.Window Foreground Color
Changing the Window Foreground Color setting in a window that contains text also changes the color of that text. If the window contains graphics, the color of the graphics changes.To change the default window foreground color, click on the Window Foreground Color button. Session Manager displays a color mixing dialog box. For more information about mixing colors, see Chapter 4.
If you save your changes by clicking on Apply or OK in the Window Colors Options dialog box, your new setting takes effect when you start your next session.
Highlight Color
To change the default color of the location cursor used in keyboard traversal, click on the Highlight Color button. Session Manager displays a color mixing dialog box. For more information about mixing colors, see Chapter 4.If you save your changes by clicking on Apply or OK in the Window Colors Options dialog box, your new setting takes effect when you start your next session.
Note that you can also change the pattern used for highlighting. This is especially useful on monochrome and 4-plane color systems.
DECwindows software allows you to run applications from another computer for display on your workstation monitor. By default, your workstation monitor can display only those applications that are running on your workstation. This prevents users on other systems in the network from displaying applications on your workstation monitor and from capturing and displaying your keystrokes (including your password) on another monitor.
From Session Manager's Security Options dialog box, you can authorize yourself or others to use your monitor to display applications that are running on other systems. See Chapter 12 for information about supplying this authorization.
| Previous | Next | Contents | Index |
|
|
| privacy and legal statement | ||
| 5633PRO_006.HTML | ||